Thursday, January 31, 2013

Education Eggs ~ Engaging Hands-On Learning!

I am EGG-tremely  EGG-cited about this new center activity!  Sorry for the lame EGG-spressions ;)  So, let me introduce you to Education Eggs:

The first edition I have created is the Initial Sounds Set.  It comes with six Carton Cards with eggs depicting something that begins with each letter of the alphabet.  You will, of course, need an egg carton as well as a dozen plastic eggs.  The set also comes with "Egg Yolks" with all the letters on the alphabet.  You can use a craft punch (1 and 1/2") to punch these out to save time (and this is less tedious).  I glued my "yolk" onto a wooden craft chip, but you can just laminate it if you prefer.  Here is the best part:  You can differentiate the activity!  So, if you have a student who is a novice with beginning letter sounds you can place your yolks/eggs in the order matching the Carton Card.  Then each egg becomes a self-checker.  

If you have students who are developing the skill you can mix the eggs up in different places so they must open the egg and discover that the wrong letter is in the spot!  Now they must find the egg with correct letter.    

A recording sheet is included as well.  Take a look on my TeachersNotebook shop HERE!

Don't forget the BIG sales on Superbowl Sunday!


Wednesday, December 19, 2012

Teaching Children Gratitude

Our family is very blessed!  Don't get me wrong ~ we have our share of burdens, and heartache has not been a stranger to us, but overall, we are very blessed.  I do not want our daughter to grow up feeling entitled to all that she has.  This is something that weighs heavy on my heart.  I want my daughter to be thankful for what she has and to always give thanks to God.  What I am  learning is that this is a something that I must teach her and model for her.  In the beginning, I admit I thought my efforts were in vain and my words falling on deaf ears.  But I am starting to see the results.  Many mornings when we are leaving for preschool she will say "What a beautiful day God gave us Mommy!"  It warms my heart to hear her acknowledge the blessings around her and, more importantly, give the thanks to God.  However, she is onlt three and a half and there are so many moments when she is selfish and ungrateful. 

I came across a great resource from the blog Bible Fun for Kids and although I absolutely LOVE her idea and her generous free resource, I needed to modify it a little to meet our needs and added Bible verses that were relevant to the page.  One of my favorite pages she created was a page saying "Thank you God for my mouth."  Her child put on lipstick and put kisses all over the paper!  This is just too cute not to do :)  Our daughter LOVED putting lipstick on, although she wasn't quite adept at kissing the paper LOL!  After she kissed the page, we talked about the things she can do with her mouth and I wrote the things she told me.  I also taught her about uplifting people with our words. 

Another page that I thought was great from Bible Fun for Kids was the hand page.  We traced her hand and then we read the book One Hand, Two Hands by Max Lucando:
This book is PERFECT for little ones to learn to appreciate something they take for granted on a adaily basis ~ their hands!  It talks about all the wonderful things you can do with your hands such as hug, help, wash, eat, and pray!  I highly recommend this book!  After we read the book we talked about all the things she can do with her hands I wrote them on the page for her.
We did something similar for the page titled "Thank you God for me and all that I can do!"  We read the book God Gave Us You by Lisa Tawn Bergren: 
This is a delightful story about a mama and papa bear and their little cub who was given to them by God (no real discussion of how the baby gets into the belly ~ so it is perfect for younger ones!)  After reading the book, we wrote down all of things that she can do: count, dance, paint, sing, play, etc...
Another page that is very interactive is the one titled "Thank you God for all the creatures of the earth."  I cut out pictures of animals for her to glue on the page.  For this page, we read another awesome title from Lisa Tawn Bergren ~ God Gave Us the World: 
 
The prayer page: "Thank you God for hearing my prayers" is not interactive, but I think it is one of the most important pages.  Notice I did not make the title "Thank you God for answering my prayers."  Most children are not mature enough to understand that God is not a giant Santa Claus who will give them everything they want; I certianly don't want my daughter to get the wrong impression when her prayers for incosequential things go unanswered, so that is why I worded it that way.  A great book to read about prayer is This Little Prayer of Mine by Anthony DeStefano.
 
There are many other pages in this book/journal that I created, but the last one I want to share is the page titled "Thank you God for my clothes" just because it is fun!  Another blogger, Stacy from Share and Remember posted the most adorable project!  Please click on the picture below to go over and read about her Cozy Sweater Collage!  this is what I plan to do for the clothing page!
 
I hope this FREE Gratitude Book and Journal blesses you are your child(ren) and helps you build up their Gratitude muscles :)  Grab yours by clicking the picture below!


Sunday, December 16, 2012

Angel Ornament for Victims in Newtown, CT

Like most Americans, I am heartbroken over the shooting that took place in Newtown, CT.  As both a teacher and a mommy I just can't wrap my mind around it.  I find myself weeping at random moments throughout the day. Church was my refuge this morning.  As is the case when any tragedy befalls. people cry out and question how God could allow such evil to happen.  One thing I know for certain is that God uses ALL for good and He will use this tragedy for good.  

All I can do is pray ~ ceaselessly.  There is power in prayer.  I made an angel ornament with the names of all of the victims.  I applied an idea from Pinterest by printing out the names with their DOB and cutting them into thin strips  Next, I curled the paper around a pencil and then placed them into a clear ornament.     This ornament will help me to keep these victims and their families in my prayers this Christmas season.  


Monday, November 12, 2012

There Was an Old Lady Who Swallowed a ___________!

I am slowly collecting every There Was an Old Lady Who Swallowed a _____________! book known to man.  They really are quite fun and silly :)  I saw a cute garbage pail "old lady on Pinterest as well as a shoe box old lady.  I decided to combine the two ideas and create an old lady for all the old lady props we use with the book.


You can make on by picking up a swing top garbage can - I purchased this one at Target for $10.  You will also need a large old lady head!  Don't worry ~ I have downloaded one for you HERE :)  Cut out the mouth area and ModPodge her to the can opening.  Next, find some props for each story, or print some of your own.  Scrappin' Doodles has great old lady clip art to go with most of the stories. 

ENJOY!

Saturday, November 10, 2012

Elf on the Shelf MEGAPACK!

I am BEYOND excited about my new Shelf Elf Preschool MEGAPACK!  It is chock full of awesome learning and fun.  Here is a list of all the learning activities you will find in the MEGAPACK:
  • Color the Elf's Hat
  • Size Sorting
  • Shadow Matching
  • Shape Recognition and Matching
  • Cutting Practice
  • Magent Page (E is for Elf)
  • Alphabet Puzzles
  • Elf Counting
  • Same and Different
  • Elf Antics Game
  • Don't Eat Chippey! Game
  • Cookies for Santa Game/Center
  • PreWriting
  • Visual Discrimination
  • Let's Decorate the Tree Game/Center
  • Hot Cocoa Counting Game/Center
  • Unscramble Santa's Mail (Alphabetical Order)
  • Elf Story ~ Position Words
  • Magic Elf Mint Seeds (Labels and Tags for gifts)
  • Elf, Elf, Who's Got the Elf? Game
  • Elf Scavenger Hunt
I think the games are the most exciting part of this pack for me :)  We are hosting an Elf on the Shelf Shoebox Shindig for our daughter's preschool kiddos and I can't wait to do the Elf Scavenger Hunt with them!  What is an Elf Scavenger Hunt?  Well, I am glad you asked!  Just print out the elves on card stock and laminate them so you can use them year after year.  We also do a Ghost Hunt and a Turkey Hunt, so I use paint stirrers ~ they were generously given to me for free at our local Lowes ~ and I use velcro to attach them to the sticks.  This way I can swap out the "object" of our hunt all year. 

Outdoor Elf Scavenger Hunts are the best!
 
By the way ~ if you are a big fan of The Elf on the Shelf you will definitely want to get the movie if you haven't already.  It is ADORABLE!  It is perfect for preschoolers too since it is only about half and hour.  Our daughter begs to watch it over and over until Mommy can't take it anymore ;)  I highly recommend it!
The main character elf in the movie is named Chippey and he is such a cutie!  I had to make a game for him based on the popular games all over Pinterest: Don't Eat Tom!, Don't Eat Fred!, Don't Eat ___________!  I created Don't Eat Chippey!
Another excited part of the pack is the cute label and tag for some Magical Elf Mint Seeds to be delivered directly from the North Pole compliments of you Elf on the Shelf!  The Happy Home Fairy had a GREAT post about Magic Mint Seeds and we did it last year.  We planted our "seeds" in the first snow of the year!  What sprouts up in truly magical!  CANDY CANES!


I created some Magic Elf Mint Seed Labels and Tags so you could spread the magic to others!
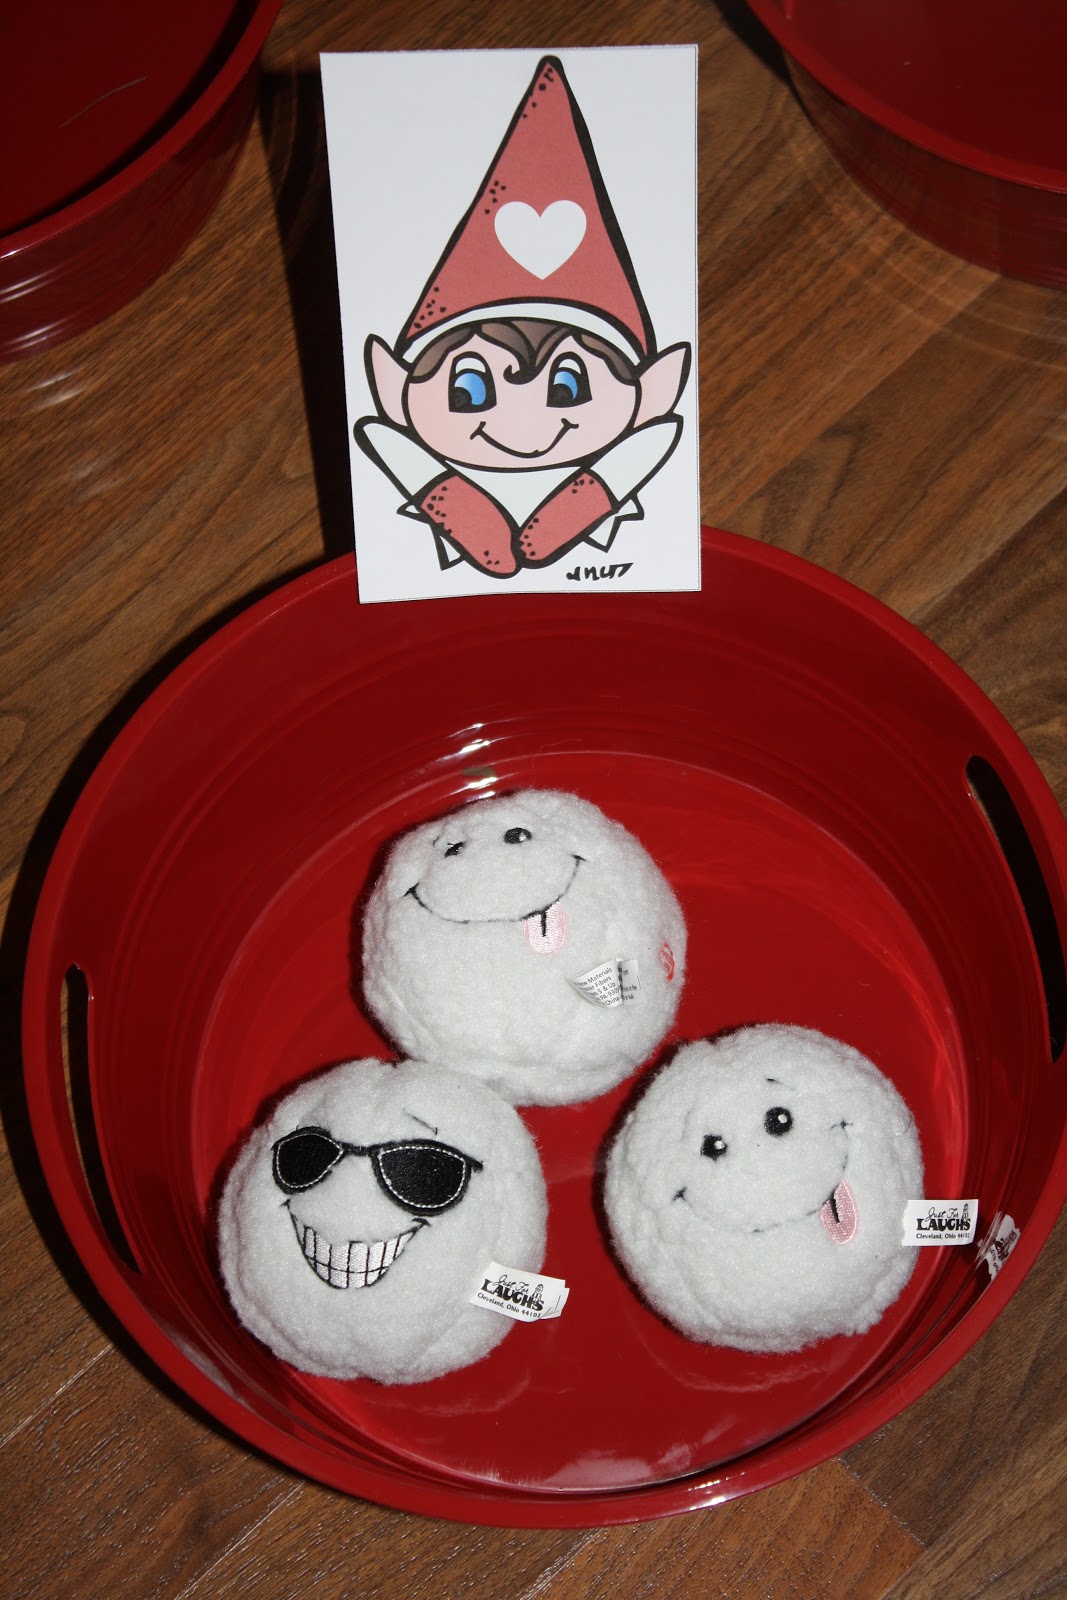
But now it is time for an ELF LOVE FREEBIE!!!  This is an interactive learning game that is sure to be a hit with your little ones!  What could be more fun than throwing snowballs indoors!?!  Print out the Elf Shape Cards on card stock and laminate for durability.  Glue a clothespin to the back.  Now you can attach it to the back of a bucket or basket.  Children take turns throwing snowballs into the buckets.  When they are done they count how many snowballs are in each shape.  Lastly, they complete the graph.  Our daughter had a blast!

GET YOUR OWN CARDS and GRAPH FREEBIE!  Click on the picture below to download your own:)
ENJOY!

Tuesday, October 16, 2012

Tower of Babel Brownies

I do my best to read the Bible with our daughter daily.  Sometimes I fall short of what I desire and we only get to read 3-4 nights a week.  Every morning we read our devotions and this is becoming a habit and a beautiful part of our morning routine as we snuggle in bed together.  I often wonder, however, if she is really understanding the stories we read.  So many of the words are beyond her.  I try to use language that is easier for her to understand, but I still feel I fall short in getting the message across.  My hope is that these readings will at least familiarize her with the people in the Bible, but most important, to Jesus.  I also fear that she gets the wrong message when she hears how often God punished people who disobeyed ~ specifically in the Old Testament stories.  I do not want her foundational understanding of God to be: Obey=Good and God accepts you; Disobey=Bad and God is mad at you. 

I am using the best children's Bible's available (and we probably own seven children's Bibles!) and I cross-reference them and chose the one that explains the story in the most appropriate manner for her age: BTW ~ she is three and a half.  I also love printable mini-books from Christian Preschool Printables. 

Ironically, at this point in this blog entry, I went to put our daughter to bed.  My husband and I read with her and then I reread the Bible story of Abraham with her.  She remembered Abraham and Sarah's son's name!  I guess she is listening! :)

Today, we talked about the Tower of Babel.  This is a hard concept to grasp for a preschooler.  While they can understand "a tall building" it is much harder to explain people feeling proud of themselves.  Language is also a hard concept if they only know English.  I printed the minibook from Christian Preschool Printables and after we read the story in her Bible we read the minibook.  Then we baked some brownies!  I told her that the brownies were like the bricks that the people made.  Once the brownies were cooked I cut them into "bricks" and we built a brownie tower.  Then we had fun knocking it down and eating them! 


I would love to hear about any Christian resources for Preschoolers that you have found to be of value!


Monday, October 15, 2012

Organizing PreSchool Packs to Save Time & Money!

One of the best things in world is the ability for us to share our awesome materials with the world!  I admit, however, that I am a Pin-aholic, blog-aholic, TpT-aholic and a Teachers Notebook-aholic.  What does this mean?  Well, it means that I see so many incredible resources that I spend a lot of time and money printing , laminating, and organizing these materials.  I prefer to store them in a manner that affords me the luxury of using them multiple times.  The best method I have found is utilzing paper protectors and laminating things that are more suitable for lamination.  For example, I store all of the songs, visual discrimation, and magnet pages, grid pages, and coutning pages in page protectors.  When our daughter uses them I let her use a dry erase marker, dry erase crayons, or we place them on a cookie tray and she uses her magnets. 
Magnet pages are stored in sheet protectors and then used in a cookie sheet with magets.
Grid Games and Counting Mats are also stored in sheet protectors so they can be reused.
Add caption

Prewriting practice pages and Same or Different pages are also stored in sheet protectors.  She uses a dry erase crayon to "write" or circle the same/different picture.
Other items, such as games and puzzles, get laminated and I store all the small pieces in a CLOSEABLE self-adhesive CD sleeve. 


Couting Mats that call for the child to place a certain number of items depending on the numeral shown are laminated. The counters are stored in a self-adhesive CD holder and the numerals all have velcro.

Why do I use CLOSEABLE CD sleeves?  Because I place everything for a month or theme in a HANGING binder :)  All of these binders are then placed in order by month in a file drawer! 
 
I also use the self-adhesive CD holders to store miscellaneous items like vocabulary cards and small puzzle cards.
Lastly, I use resealable 6x9 envelopes to store larger puzzle pieces and larger cards that won't fit in the CD holder. 
I hope some of these ideas help you!  I would love to hear about some of the ways you store your Tot Packs and PreK Packs :)